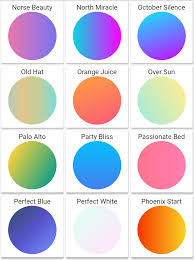
How to Create Gradients for Flutter with Real-Time Preview
Flutter offers a straightforward way to implement gradients, adding visual appeal to your applications. This guide shows you how to create and preview gradients in real-time, streamlining your design process. We’ll explore different approaches, from basic linear gradients to more advanced radial and sweep gradients.
The LinearGradient Widget
The simplest way to create a gradient is using the LinearGradient widget. This widget creates a linear transition between multiple colors along a specified axis. Here’s a basic example:
|
|
This code creates a container with a gradient transitioning from blue to red diagonally. You can adjust the begin and end alignments to change the gradient direction. Adding more colors to the colors list creates a smoother, multi-colored gradient.
Advanced Gradient Types: RadialGradient and SweepGradient
Flutter also supports RadialGradient and SweepGradient. RadialGradient creates a circular gradient emanating from a central point. SweepGradient creates a gradient that sweeps around a circle.
|
|
This creates a circular gradient. Experiment with radius and center for varied effects.
Real-Time Preview Tools
For efficient gradient design, consider using a tool offering real-time previews. While Flutter’s hot reload provides some feedback, dedicated tools accelerate the process. A helpful resource is the Flutter Gradient Generator. This online tool allows you to visually adjust gradient parameters and instantly see the Flutter code generated.
Using ShaderMask for Complex Effects
For even more creative control, consider using ShaderMask. This widget allows you to apply a shader (like a gradient) to another widget, enabling complex masking effects and gradient applications beyond simple background fills.
|
|
This example applies a purple-to-pink gradient to an image.
Conclusion
Flutter’s gradient capabilities are versatile and easy to use. Combining these techniques with real-time preview tools can significantly improve your workflow. Experiment with different gradient types, colors, and alignments to achieve the perfect visual effect for your Flutter applications. Remember to leverage online resources and tools to expedite your design process.
